The FaxPress Migration Wizard allows you to:
| ■ | import users from a source FaxPress server (version 7.1 or later) to a destination FaxPress server. |
| ■ | import users from a source FaxPress server to a destination FaxPress server. |
The Migration Wizard also allows you to import user account data like personal phonebooks, personal cover pages, corporate phonebooks, and corporate cover pages from user accounts on the source FaxPress or FaxPress server to the user accounts on the destination FaxPress server.
Migration Procedures and Requirements
During the migration process, all Archive databases should be frozen, meaning all Archive related processes should be stopped. The Archive migration procedure includes the following steps:
| 1. | Stop all FaxPress Archive services. |
| 2. | Have all clients log out and make sure both servers should be idle. |
| 3. | Backup both Archive databases for the FaxPress server. |
| 4. | Run the migration utility to migrate Archived jobs. |
| 5. | Confirm all jobs migrated successfully. If the migration failed, replace the Archive databases with the backup copy and now we go back to the status before migration. |
Checking FaxPress Server Field Types
Before running the Migration Utility, you’ll need to know the field types of two Archive table definitions for both the FaxPress server.
In the FaxPress server’s Archive database, find out whether the field type for FAXPRESSSERIALNUMBER is the default TEXT in both the FPFAXINFO and FAXTRANSACTIONINFO tables, or has been modified to the NUMBER field type.
Step 7 in the Migration Wizard procedure will require you to know this information. The Migration Wizard uses this information to build the command to pull information from the databases.
Running the Migration Wizard Utility
To use the Migration Wizard utility, follow these steps:
| 1. | Log in to FaxPress Plus as Administrator. |
| 2. | From the Start menu, choose Programs>FaxPress Plus>Tools>Migration Wizard. |
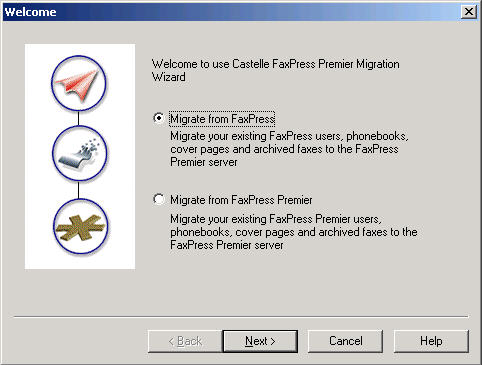
| 3. | Specify the type of server you are importing from, either FaxPress or FaxPress Enterprise. |
The procedure for the Migrate from FaxPress Enterprise option is very similar to the procedure for the Migrate from FaxPress option. Options specific to the Migrate from FaxPress Enterprise procedure are indicated.
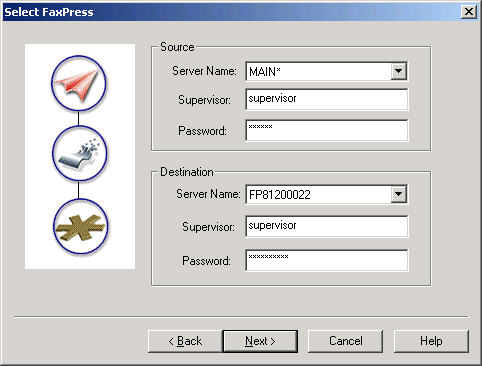
| 4. | Select the source server you want to import from, using the Server Name pull-down menu. Enter the Administrator name and Password for the Source server. Select the destination FaxPress Enterprise server from the pull-down menu, enter the Administrator name and password for that server, and click Next. |
| 5. | The Select Option window lets you select items to import from the source FaxPress. In this example, user data, corporate phone book, and archived faxes from the source server are chosen. Click Next. |

| 6. | The Archive window will appear if you have chosen to import archived faxes. (If you are not importing archived faxes, please skip to step 14.) Select Using the same Archive database to keep using the same database for faxes. To create a new location for the Archive database, select Using a different Archive database and skip to step 9. To use the same Archive database, select the type of database (Access or SQL) in the Source DB tab and enter the password for the database. |
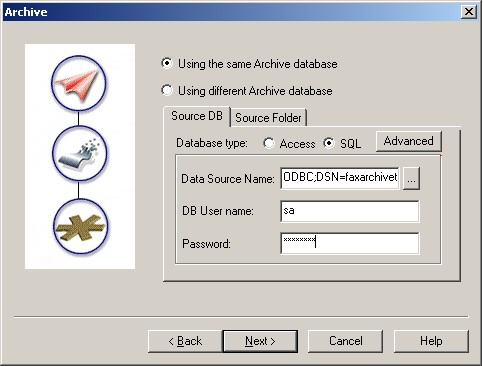
| 7. | Click the Advanced button. The Advanced button requires you to select the field types of the Source DB. See Checking FaxPress Server Field Types for more info. |

If you’ve confimed that the default field type values have been modified, use the Advanced screen’s pulldown menu to select new values for the FPFAXINFO and FAXTRANSACTIONINFO fields. Otherwise, the values displayed are the defaults and should be okay unless the field types have been modified.
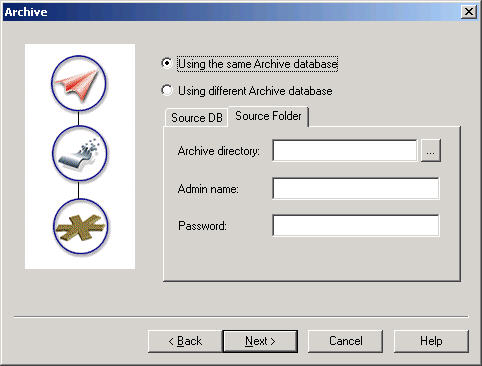
| 8. | Select the Source Folder tab, browse to the Archive database directory, and enter the name and password for the andimistrator with access rights to that folder. Skip forward to step 14. |
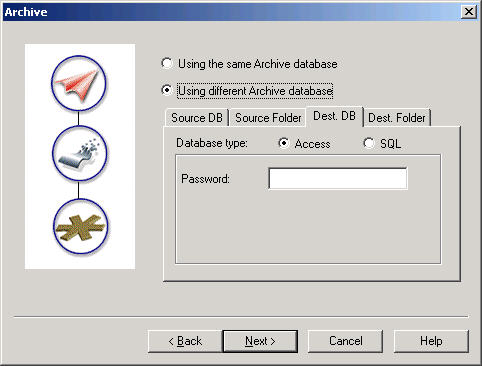
| 9. | To create a new location for the imported Archive database, select Using a different Archive database. Four tabs will appear. In the Source DB tab, enter the password for the database from which you are importing the archive. |

| 10. | In the Source Folder tab, browse to the directory for the database you are importing the archive from, then enter the name and password of the administrator with access rights to this directory. |

| 11. | In the Destination DB tab, select the type of database (Access or SQL) you are importing the archives into and enter the password for the database. |
| 12. | Click the Advanced button. The Advanced window requires you to select the field types of the Destination DB. See Checking FaxPress Server Field Types for more information. |

If you’ve confimed that the default field type values have been modified, (see Checking FaxPress Server Field Types for info) use the Advanced screen’s pulldown menu to select new values for the FPFAXINFO and FAXTRANSACTIONINFO fields. Otherwise, the values displayed are the defaults and should be okay unless the field types have been modified.
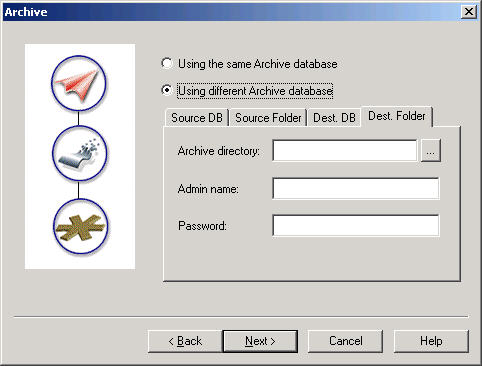
| 13. | In the Destination Folder tab, browse to the new archive directory, then enter the name and password of an administrator with access rights to this directory. After configuring the required tabs, click Next. |
| 14. | The Select User window requires you to click either the All Users option, as shown, or click Selected Users, then select individual users to import. Click Next. |

| 15. | In some cases, especially if the Active Directory Synchronizer is used, FaxPress Enterprise user accounts may already exist on the destination FaxPress Enterprise. The Select User Option screen allows you to specify whether or not to overwrite the existing user accounts on the destination FaxPress Enterprise with user account data from the source FaxPress Enterprise. |

| 16. | The Select User Option screen allows you to specify which data from the source FaxPress Enterprise user accounts you’d like to copy over to the destination FaxPress Enterprise. |

Replicate default users – Selecting this option will copy the set of default users from the source FaxPress Enterprise over to the destination FaxPress Enterprise. The default users copied from the source FaxPress Enterprise will exist in addition to the same set of users already existing, by default, on the destination FaxPress Enterprise.
Replicate mailbox ID – Selecting this option will copy the mailbox IDs of the users imported from the source FaxPress Enterprise to the same users on the destination FaxPress Enterprise.
Replicate personal cover page – Selecting this option will copy the personal cover page or pages of the users imported from the source FaxPress Enterprise to the same users on the destination FaxPress Enterprise.
Replicate personal phone book – Selecting this option will copy the personal phone books of the users imported from the source FaxPress Enterprise to the same users on the destination FaxPress Enterprise.
| 17. | The Summary window lists the migration choices you have made. Check the list to make sure you have made the migration choices you want. To make changes, click Back or click Next to begin importing users. |

| 18. | The Finish window opens when the process is complete. If there are any errors during the migration process, they will be displayed as shown below. If there are no errors, click Finish. |

| 19. | Log on to the destination FaxPress Enterprise server and check the Properties of the imported users to make sure the users have been imported as specified. |
|
FaxPress Enterprise & Enterprise Redundant WebHelp
Last Updated: 11/1/2007
E-mail this page |
Castelle 855 Jarvis Drive, Suite 100 Morgan Hill, CA 95037 Toll-free 800.289.7555 Tel 408.852.8000 Fax 408.852.8100 |